While Microsoft has put lot of effort for the basic tasks to be as easy as possible, importing photos from your digital camera in Windows 10 is straightforward and you can do this in different ways. In this article, we will stick to the most common and easiest method to import your favorite snaps to the computer. Only File Explorer and Photos application are required during the process. Photos on modern cameras take a lot of space so it is recommended to use the auto-delete feature and transfer the photos you really need. Not only will it save space on your computer but it will also facilitate your job of browsing through 100s of images.
You can also organize your photos in folders and subfolders to better keep track of them.
Let’s see how to import images into Windows 10, step-by-step.
1. Connect the digital camera to your computer.
2. Open File Explorer.
3. Right click the camera and choose “Import photos and videos”.
4. “Review and organize” – choose this option to see what exactly you need to import on your PC.

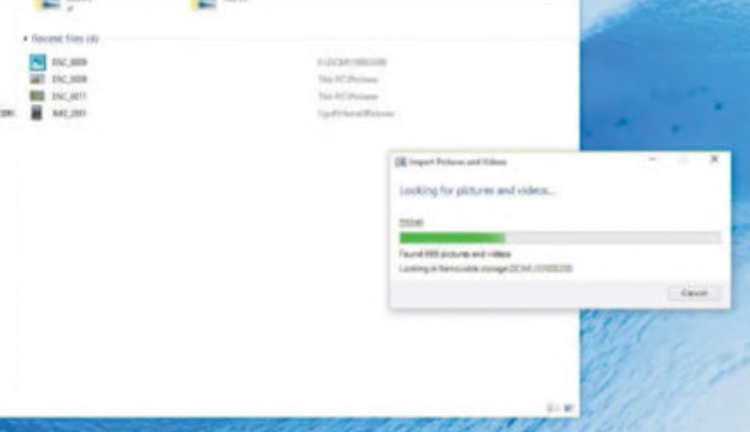
5. Click “Import”.
If your camera breaks down images into groups, choose only those you want to import.

5. The import process will complete soon.
That’s all, folks!
If you have any questions, please leave your comment below.


Downloaded windows 10 and tried to put pictures on computer. It shows the number of pictures I have on the camera but won’t transfer them.
Exactly! Nothing on these sites are actually helping.
Have the same problem 🙁 !! It won’t transfer.
The screen freezes after locating photos, then even the cancel button fails to work.
I recently bought new computer and have been trrying for last 3 hours to down load from my camera to computer. It states that there are no photos on the camera. This is stupid as the photos are there for everyone to see but just wont download them. I feel ripped off with this system
Same here !!
Did you try putting the card , into your computer or just use the usb cord.?
I am having the same problem. I have to put the scan disc back in my computer in order to see them. It’s driving me crazy. I have been searching the Internet trying to find proper instructions. HELP.
plug in camera to computer ,turn on camera —go to app –find camera and load caution will load everything on the camera each time –need to take the ones you don’t want click each group off
Well, I followed the instructions, opened file explorer, no ‘camera’ to click anywhere!
if you have found a solution please let me know
Same thing with me. No camera anywhere to click on.
right click on the camera then select import
Why don’t I have a camera to click on?? Me and a lot of people above me
Can you try to install the Windows 10 driver provided by the camera manufacturer? Seems this is a software issue. I have read somewhere, some folks encountered a similar error on Windows 8 so maybe this helps.
Windows 10 is saying they are already imported,. but windows 10 only has up to April 2014.
Susan
Mine too. Won’t take the latest from my camera. Keeps saying all imported. Windows 10 is absolute rubbish but apparently I had to have it as I bought a new laptop which came with W8 which is even more rubbishy than W10.
I’m going back to my engineer to get him to put W7 on as I had that on the laptop that died on me and I could whizz through things. Knew exactly where and how to get things done. I’m too old for all this complicated new stuff, most of which I don’t need. Why do they have to keep changing things?!
Same with me! I am not at all impressed with windows 10. I previously used windows 7 home premium. I had it all set up so nicely. For photos, I’d take the SD card from the camera, plig it into the slot and the “auto play” menue came right up. It imported very quickly and if I wanted, it deleted them even quicker. I only had windows 10 for a few days and I am not happy. In all fairness, there are some things that are cool, but my main concern is photography and 10 just won’t cooperate.
same with me too – windows 10 is rubbish and back to windows 7
Before i had windows 10, i used to be able to download pictures from camera to computer and would import by date, now on windows 10 it does it by Month so all my photos are in 1 month not date..does anyone know how to import then showing dates!!!! i take several photos daily like 2-3 days and the 4 th day try to download and cant see what pictures i took on what day..so frustrating!!!!!!!
Michelle, I have this same problem. I take lots of product photos and need them in their own folder for each new download time, but it has put every photo I took in December in the same folder. I have looked but can’t find out how to change this.
I to have this date problem. All of my previous imports were saved in yyyy-mm-dd format. WhoTF…k in MS decided to make these gratuitous changes with no way to change them. I also ran into the problem of what folder structure the photos were saved in. The process picked a sub folder under pictures and dumped all of the imported photos there. How to I change this back to a root folder? Dam those designers.
I have given up on the photo app. I ran across the comment to use File Explorer and setup the defaults that give me the results that I want, every time. I use a third party program to edit my photos so, it turns out tht the photo app is totally useless and I will uninstall/delete it. Take the easier/faster route and use File Explorer.
Regards.
I figured out how to get this feature back. You need to download Windows Essentials. Then go in the photos window and click import. It was not easy to figure this out, I just happened upon it when researching photoshop.
BUT shouldn’t a new operating system upgrade INCLUDE an app that just instinctively imports photos…like the old one did??? It is so stoooopid that people have to download an app to import their photos.
I’ve had this exact problem since Vista/7. I take tons of photos of my kids so I consider it a necessity that they’re sorted into dated folders.
The past year I’ve had brand new issues. One I somehow fixed today which was my laptop refusing to recognize my phone. Not sure if it was a Windows update or something I did different when connecting the phone and laptop. Just know that works perfectly again.
The problem that I can’t seem to find a fix for is my laptop, when searching for my photo/video files, decides to gather every single image file on my phone. Meaning, instead of 600 photos that I’ve personally taken or saved, it’s pulling up several thousand image files from all the apps, my contacts, etc… Why TH would I want to import those??
It’s great that once it’s done gathering all the files to import it gives that nice option to look through them all and pick which ones actually get transferred. *sarcasm* I don’t want to sort though 7,000+ files to get to the 600 that I actually want..
Followed instructions as given, but after opening file explorer no camera was show even though it was connected!
Any advice please?
followed instructions but after opening file explorer no camera shown even though it was connected.
Appreciate some advice.
Make sure your system recognises the camera (that the drivers are working). If you cannot see the camera, you may want to consider downloading the camera drivers provided by the manufacturer for Windows 10 and install them.
Thank you so much Andrei! I have the same problem as Trev above: after opening file explorer, there’s no camera icon to be found.
“downloading the camera drivers provided by the manufacturer for Windows 10 and install them.”
Do you mean to download the drivers from the camera manufacturer and install them in the Win10?
I’m sorry if this is silly question but I’m a newbie… Thanks again.
Yes. I’m sure he means the camera software. All new digital cameras come with a software CD that you play in your computer. It “introduces” your camera to the computer and makes them compatible. In your computer, you should also see that the device (your camera) is recognized. When you have this established, you’re off to a great start. From that point on, you should only need to insert your cardfull of photos into the computer and you’ll get a pop-up asking you want you want to do. I always go with “import photos/videos”, the computer does the rest. Good luck!
No, my camera did not come with a CD. It’s now 2021 but I am having these same problems others have posted about with my new computer that has Windows 10.
I cannot import pics from my camera chip. I insert it and no downloading occurs.
I could do this with windows before. I have no way to connect my camera to the computer. the chip insert always worked before. help!
I can’t upload from the SDHC card either. This is a lot of bullshit. Windows 10 is not the best experience I have ever had with windows and now i am seriously considering a mac. The old importer was great! There was absolutely nothing wrong with the way that functioned. I never had a problem with it though it might quit working if I uploaded tons of pics at a time.
can’t upload from the SD card either, with windows 10, I have had two different Geek Squad guys try to help. The photos are no where to be found. Must have a problem with windows 10.
I hate windows 10 this is the worst experience Ive ever had with an operating system I cant dl pics from my cam chip This is bullshit now I have to pay to fix it I hate microsoft what a fucking rip off Wish there was another system we could use but they know they have us by the monetary balls SHAME ON YOU microsoft
i agree with all the comments on this site.It was so easy before window10,now i cannot get my pics to upload from my camera to this windo10 HELP
Your new digital camera should have some with software in the form of a CD that you play on your computer. It “introduces” your camera to your computer to establish compatibility between the two. If it’s done correctly, you should see an icon of your device (camera) in the list of any other devices you use with your computer. Once you have that established, you should be guided through the process. Good luck!
“Right Click camera” Should I be seeing a camera icon? None seen.
So I figured out how to do this. When the card goes into the port the SDHC shows up in your drive listing underneath all of the options for your drives. Click on it from the list, it will show a file for the photos. Click on the file and all of your camera shot labels show up. You have to select each jpeg file. Then at the top of the menu there is an option to move files. Click on the move option. A drop down menu for your files will appear. If you want to save the files for the day then select the new file option at the very bottom of the drop down menu. Name the file and save them.
It is a pain in the ass. But at least you can save by the day this way.
Thank You! This worked for me when I couldn’t figure out anything else. It was so easy before I had Windows 10, but this was almost as efficient.
I am trying to follow your instructions, but when I insert my scan disc & open my photos, I don’t see any drop down menu.
This article is misleading because with default settings, the photo app is used to import and there are no settings. It imports by month and puts them in the default pictures folder. The only way to use the method in the article is to go into auto play settings and set it to do nothing when you connect your camera. You can then use the above method or create a shortcut to get to the windows7/8 import utility that allows you to organize by day and designate a specific download location
followed steps 1 & 2, camera did not show but drive J did, clicked on drive J and all photo’s showed up,highlited photo’s I wanted, clicked on move to and done, deleted others no wanted.
I am running win 10.
Many thanks.
Oh great Roy! I hastened to follow your suggestion and tried to find the Drive but it didn’t show it, probably because I don’t seem to have the drivers for the camera.
I thought yours could be a shortcut for me, but I can see I’ll have to download drivers as Andrei suggested. :o)
I did as suggested but it says that no video’s or pictures were found on this device? I have 1000 pictures. Like all th eothers, I never hada a problem before windows 10? Any advice?
Terrible system shame on microsoft for doing this to the public………. NOTHING IS FREE ……..Now we have to pay to fix it Awful system I hate it This seems like a scam from micorsoft I hate them This is such bullshit Cant DL pics and crashes my PC all the time………. MICROSOFT YOU SUCK!!! I will make it my mission to find anything BUT microsof products from now on …….You know you have us by the balls here……. Despicable company to do this to the public Its a suck ass system and now we have to PAY to change it back to what we ALREADY PAID FOR THE LAST WINDOWS SYSTEM WE ALREADY HAD ON OUR PC’S AND LAPTOPS…………. REALLY MICROSOFT???????? YOU GREEDY BASTARDS
Like Ben, my PC recognized the camera, but gives me the “there is nothing on your device to import”. Has anyone found a fix to this horrible issue?
I did what the information gave me and I still can’t download my pictures because it tell me “Access Denied” Why?????? I never had this problem before. Is this because of Window 10?
Having same problem the pics are already downloaded but not in the pictures file when I go to do it again I can find them in the last import box but there is no way of saving them to my pictures file from there only sharing them which I do not want to do. I so regret taking the free windows 10 upgrade it sucks so bad should have known they would not give anything for free unless it was crap and they had other motives. I will certainly talk it down to everyone possible.
The system says the picture have already been imported, but I can´t find them anywhere.
I want to go back to Windows 7!!!
LOL! I too was greedy enough to grab the free Win10 and now….I’m p0aying the consequences!
Did you also have long interruptions from the beginning, or was I the only one who did. Like, when I opened the computer a huge sign saying “Critical Message” or something like that, and either disabled both the emails and the internet or sometimes we could use only the emails.
I never had any problems uploading pictures onto my computer , i do since i upgraded to windows 10, i thought upgrading would be a improvement , i am now having second thoughts , about going back , it is a absolute nightmare , printing photos from my computer and uploading from my camera, it does not recon-is camera , or connections , i have just worked out printing pictures already on my computer , but now i cannot work out how to upload my pictures from my camera ?? since Saturday 17 oct . keys i just about give up on windows 10 , Printing documents was my first hurdle , now sending family photos. I think you should have a warning about being computer literate of a high standard does help a lot!! but if you are basic ,like me !!!, please do not touch! Cheers.
My PC recognized the camera, but gives me the “there is nothing on your device to import”. I just installed Windows 10 is this the problem? All of my previously imported photos are there but not the ones I want to download. HELP!!
I’m trying to import photos but windows 10 doesn’t give me a camera option file explorer.Tried importing on Picasa but not importing their either.Had no problem when on 8.1. Hope you can help.
please look at my comment above to see how I figured out a work around. Im no tech wiz but I think it should work in any circumstance
This is crazy. I know sooner get the hang of something and things have to change. I am not happy with windows 10 trying to import my pictures from the memory card in my camera. I am technology challenged. Stop changing things…..
Having all sorts of problems importing photos from camera with Windows 10.I did what I was told to do on this page, where it says how easy it is on 10. I clicked on ‘File Explorer’ on the menu,then it tells me to right click on ‘CAMERA’.Problem is there is no camera option in file explorer.Can anyone help before I go back to 8.1. Cheers
in windows 7 it is possible to label your photo’s when you import them from memory stick, how can this be done in windows 10?
it is amazing that windows goes from easy to import pics from camera (windows xp) to i’ve already wasted hours of my time trying to do it with windows 10 for reasons already listed above.this is really frustrating.
I import photos from my Nikon digital camera to windows 10 photos, but they do not show up on Facebook!
Billy..please tell us how you are doing the download from your camera ?
Bloody hell…what is going on Microsoft ?? How do we download pics when there is no camera option.? I know someone explained a way to get around it, but I just can’t do that !! And no one tells us there is a problem til we find a site like this that many others are having the same damn problem !! HOW DO WE IMPORT PICTURES MICROSOFT ?????
This windows 10 for pictures is plain crap. Microsoft do not know what they are doing and dumped this windows 10 on unsuspecting people.
It was to good to be freel
A class action law suit should be started against Microsoft for putting this useless windows 10 out without proofing it first.
Photos are the worst You can not even put them in an ad (eg. Kijiji.
Microsoft should let you go back to windows 7 any time for free. This windows 10 is garbage.
Well, after waiting for an update that would help this issue that never came… I was forced to buy a card reader in order to import photos onto my PC. I guess Microsoft should have used an asterisk stating you would need add’l hardware. Pretty crappy.
I had to purchase a card reader as well.I had just installed Windows 10.It apparently is more the fault of the camera Fuji Finepix A800. Windows 10 cant read the card whereas 8.1 could.
Just reading the comments about problems with the Windows 10 program and digital cameras.My commuter skills are limited,but I had no problem taking pictures off my camera and sending them before installing this pig of a program.I thought I was the only dummy having difficulties,but I feel a little better now.I wouldn’t want to be a Microsoft spokesman in a room with this crowd.Time to dump this turkey.
The photo app worked fine on Windows 10 until 4 days ago. Getting windows 10 was not easy and 4 of the Microsoft techies took 3 sessions of 4 hours each to do thus and the last one uninstalled it completely (along with everything else on my laptop apart from documents) I was bloody hopping mad. Since the photo problems I have been asking on the forum. Replies from there ‘engineer’ said using Powershell remove and reinstall, then more rubbish and this is the final instruction. I wasn’t very polite and they have not replied. I am going to look to see what a card reader is. Anyway, this is there last response.: We apologies for the inconvenience caused.
You may try this work around.
Step A.
Create a new user account and check.
http://windows.microsoft.com/en-my/windows-10/create-a-local-user-account-in-windows-10
Step B. Copying old files to newly created User Profile
1. Go to C:\Users\(Your-Corrupted-Profile-Name)\
2. Copy all files except three files:
NtUser.dat
NtUser.ini
NtUser.log
3. Go to C:\Users\(New-User-Profile-name)\
4. Paste all those copied files here.
I suggest you to follow the below given steps and check if issue is resolved:
Press Ctrl + Shift + Esc to open Task Manager.
Right click in Microsoft Edge under app section.
Click on details, click on microsoftedgeCP.exe and click End task.
Click on End process if prompted.
Repeat it for few times and check if issue is resolved.
Read this reply on Microsoft Community.
————————————————–
NEXT STEPS*
Was this reply helpful? Give Joy Kemprai some kudos!
[Vote as helpful]
Did Joy Kemprai’s reply answer your question? Then let the community know!
[Mark this reply as your answer]
Want to unsubscribe from this thread?
Click here to go to the thread, click on the original post and click Stop emails.
*Sign in required. When you open the thread, you’ll see that your action has been automatically recorded.
This mailbox is unattended. Please do not reply to this message. If you feel that you received this email in error you can update your email settings.
Privacy Policy | Code of Conduct
I’ve found a way to get them on!!!! I put the card in the slot, opened One Drive and it detected and import them. Well it imported them all so had a bit of deleting to to. I then sent them to desktop as I needed to share 4 on facebook and that the easiest way I could think of as it’s a closed group.
Sorry to keep popping up but, those photos I put on via One Drive also appeared on the photo app. I’m now going to try deleting one from One Drive and see if it deletes the photo from the photo app. Good luck everyone, what a bloody performance we have had to deal with ourselves! Gits!
1 windows logo – E to open our computer folders
2 go to ‘this pc’ icon
3 scroll down to you camera icon (canon in my case)
4 right click select -open in new window
5 open DCIM folder
6 select you photos and drag them on to your desktop! BINGO
my path – This PC\Canon IXUS 105\Removable storage\DCIM
Thank you so very much. I followed your steps and I got stuck where it says to click on the camera icon. I looked and looked and I have no camera icon. Any suggestions?
Will appreciate enormously any help as I need to send these pix and Win10 decided to interfere negatively… :o)
Hello again cosmicdayman and thank you once more for your step by step instructions, and since I don’t have a “camera” I searched further and found the camera in the start menu. Clicked on it and….got this error message:
“Something went wrong. Make sure your camera is connected and not being used by another app.”
(I hope you could help me fix it?)
And I kept trying and trying, and….lo and behold!!! My pictures appeared! I’m so happy! Your step by step effort helped me a lot! Again THANK YOU! 🙂
I have new questions on this though if you could help?
1. It showed me also screenshots which I had saved in OneDrive…This folder is now empty and the screenshots appear with my pix! How to separate?
2. Once my pix are separated from the screenshots how could I change the order of them? i.e.: put some on top and vice versa?
3. Then do I send them as an attachment? None of these things appear on the pix page or where I can ask.
4. I don’t know which app made these pix appear, their print is white on black background, do you know which app it would be? I can’t remember what I touched to make them appear as I tried and tried so many things!!!
I hope I’m not burdening you with this matter but I THANK YOU SO MUCH FOR ALL YOUR HELP! Adela
I’ve been uploading photos nearly every day and certainly several times a week. I didn’t put any on since November and when I tried to do it yesterday it said, choose which photos you wish to import, I did, then….nothing. There is no tab to click on and ask it to start, I’ve tried everything, the background screen goes sort of phased out so I can’t click on anything there either. What on earth has happened? Why the change? What do I do now? I really need to get those photos on line.
What “camera” are you talking about? I don’t see a camera button on File Explorer.
Oh I’m sorry I should’ve given more info, and thank you for responding:
My camera is a digital Nikon Coolpix S3300. The rest of my data:
Desktop Dell Inspiron 560 4gb RAM; high speed cable; MS Windows10
64bit; Windows Live Mail 2012(awful!!!); MS Word Pro 2003; Mozilla Firefox; Avast
AV; Windows Media Player; Adobe Reader; Adobe flash Player
I made all the necessary steps from transferring from camera to computer, but got stuck right at the This PC step as I just don’t seem to have the camera icon.
Hope you have a way to import them? Thanks again.
I have windows 10 and before was windows 7 in 7 when I put sd disk in slot auto play poped up and I sent photos to a folder I set up and all my photo would load and each was numbered 1,2,3, etc now in 10 they have a dscn number any body know how to fix this in windows 10
I need to post photos on 3 separate Facebook sites every morning and have been doing this for the last 2 years but when I installed Windows 10 I could not post my photos.
I can still upload my photos to my laptop ok but now I can’t always find the photos as Windows 10 seems to just dump them all randomly in no sort of chronological order.
When I do find one of my photos I cannot upload it to the Facebook group as that Facebook group cannot find the photos so the only way is to try and post that photo to my own Facebook page and then transfer it into the group (although when I moved the photo into the group it was only visible to me)
It was taking me 2 hours to do what I normally did in 10 minutes so in the end I restored my laptop to the earlier version of Windows.
I will not be going near Windows 10 until they fix the photo problems.
Having same problem. New comp w/windows 10. Lost photos yesterday although I had done it a few days before. I know they are here, but how do I find them?? I’ll keep trying & reading. Thanks.
I want my imported photos organized by year, month and day not year month. How do I change the Win 10 photo app to do this? I am getting really pi—d by these adhock changes by MS.
Trying to have windows 10 recognize my photo card… It shouldn’t be this hard!!
very bad — that mean ??? after your . from your point , wonderful and innovated — !!! – Window 10 I NEED BUY NEW PHONE — Which willRecognized by your Window !0 ????
That is reduculous , what you did for us —
Where after File explorer , where that CAMERA to right click — it no camera —-!!!!! ????
your instruction taken from old vershion — your team/ window 10 — very not responsible
____________________
Let’s see how to import images into Windows 10, step-by-step.
1. Connect the digital camera to your computer.
2. Open File Explorer.
3. Right click the camera and choose “Import photos and videos” Where HELL it is .????????
winsows 10 import photos
It isn’t the importing of photos that is the main problem here – it’s where Windows 10 hides the photos after they have been imported
I can’t find them – Facebook can’t find them
Until Windows 10 reverts back to an organised chronological photo file then it is completely unusable for those of us who need to post daily pics on Facebook pages or even keep their photos in some sort of order.
My pictures won’t transfer either. I wish I had never gotten Windows 10 it sucks.
Microsoft doesn’t make it easy. I had to look this up on you tube before I could figure it out.
The camera comes with a USB plug. Had to use that, then right click on the “window icon” bottom left corner of desktop. Then right click, “File explorer” from the menu. (Make sure your camera is on.). After clicking File Explorer from the menu double left click “This PC” from here you should see your camera on the desk top. Right click on your camera icon and you should see a menu to import photos. create a shortcut to your desktop for easy access next time you want to import photos. just right click on the icon.
Thank you Steven, I finally called my Computer Manufacture and had them download my pictures from my camera. I spent so much money buying a good camera and then Windows 10 reared it’s ugly head. This is such a mess, I agree with everything you said. They should be bending over backwards to satisfy the consumer.
This is consumer terrorism. I have a very expensive camera that has suddenly become useless with out the ability to import my photos. As the other consumers here mentioned, things worked fine until windows 10 was installed. Microsoft has managed to screw the consumer once again, they have taken something that wasn’t so great and made it incredibly worse. Maybe a class action suit is in order. Consumers have a lot invested in your products and you should be bending over backwards to satisfy your customers. Somebody needs to be fired for this crap, windows ten is garbage.
I would like to apologize for my heated remarks above. They were clearly out of frustration with this new windows ten format. I did finally get photos imported but only with a USB cable attached directly to the camera. A card reader did not work.
Please feel free not to post the above comment.
Thank You!
Followed instructions to a T & it still says there’s nothing to import.
I still cannot upgrade to Windows 10 as it still just randomly distributes photos imported from my camera.
I need to be able to find the photos that I import but as Windows 10 dumps them randomly in a photo file, I just find it impossible to use.
Perhaps if they simply left us with our My Pictures page with perfectly organised photos then we could upgrade safely.
After reverting to Windows 10, having problems with ALL my photos on my passport. When I try to work on them in Photoshop, and other editing sites…my cursor freezes and it takes tooooooo long working on my photos. I never had a problem before. And one of my files when I decided to try to copy and paste it to my computer from the passport would only allow me to work on half the folder. The other half of them same folder showed up as if nothing was there. Just gave the Microsoft “picture” icon. I don’t know what to do. I reverted back to Windows 7 and everything is working fine just as before.
HELP!!!!!!!!!!!!!!!!!!!!!!!!!!!!!!!!!!!!!!!!!!!!!!!!!!!!!!!!!!!!!!!!
Lots of frustration and anger on this thread… Sad.
That said, here is what works and what might not always work:
1) Importing photos through the Windows 10 Photos app using the camera’s USB cable should work. There was a few cases where it did not, but these have been corrected: first some Nikon cameras were affected by a bug, leaving most Nikon users in the cold. This was fixed in September. Next, several Fuji cameras required a firmware update. Fuji has communicated clearly regarding this and offered firmware updates last autumn. Finally, there was a couple of device compatibility issues in the photo import component in Windows that where fixed in the November update, so today importing through USB through the new Photo app should work pretty much 100%
2) Importing photos by removing the memory card from the device and plugging it into the computer is hit or miss. Most card readers actually work fine, in particular the card readers based on USB2, USB3 or PCIe. There is a class of card readers which are known to have problems, those are often attached to the computer through a SATA connection. I realize this is pretty technical but let’s say that newer card readers tends to be USB-based and will work fine, while older card readers are more hit and miss. Members of the relevant teams are aware of this issue, believe me, but are currently scratching their head asking themselves if this must be fixed or not, and by which team. Hopefully this will be corrected in the next Windows 10 update in June. In the meantime I’d recommend to connect the camera through its USB cable, or to purchase an inexpensive USB card reader, taking into account that an USB3 card readers connected to an USB3 port in your computer (usually blue) is the fastest way to transfer photos and videos, and that in such a setup the new Photo app will flat out beat everything else in import speed, in particular if you have fast memory cards.
There is no switch to revert back to importing all photos from a given batch into a single folder. The mechanism inside Windows can absolutely do that (this is in fact the default mode) but the Photos app insists to import by date and there is currently no way to change that. On the other hand, the Photos app gets updated through the Windows Store so this particular point could be addressed on relatively short notice, long before the next Windows release. One way you can help make this happen is to report your thoughts through the Feedback app built into Windows 10. Select the Photos app section and tell for example that you don’t like how the Photos app imports by date, because it makes it impossible to find your photos afterwards. The people that need to hear you are called “program managers” – which is misleading because they don’t program and they don’t manage either – but those are the folks who make the decisions regarding, for example, where and how the imported files should land on your machine, and they will eventually hear your feedback.
Anyway, don’t despair. The compatibility and usability issues will get ironed out eventually.
Many thanks to all of you above – they let us know we’re not mad or dim – the windows 10 download from camera ‘function’ simply DOESN’T.
Our answer, as we have two computers, one on Windows 7 (bless it) and one new computer on windows 10, is to download on Windows 7 – ‘cos it works sweetly and simply – put the contents on a stick, and put this into Windows 10 computer. Into the ‘saved photos’ file already there. It is helpful to have the right date on you camera, so that they get logged in at the date you expect, and have a title on the folder that you can recognize. It is noticed that windows 10 does not number the photos as Windows 7 (and 8) bothers to do.
If you haven’t got another computer to work from, the a card-reader and USB will do the same, we checked this with a simple and cheap card reader that we had. It works.
It just means ignore the processes Window 10 function suggests. They don’t seem to exist.
BTW if you right click file explorer we were lucky enough to have our camera recognized – but “no content showing” which is nonsense. If you use the card reader and USB it recognized that …. well it worked for us.
Using a card reader did not help me. I am hoping from all these comments Microsoft techs can figure out a solution for us. Do not have the option of connecting camera to computer. Was wondering if the HD card has a special problem.
Please email me if a solution is posted.
It is important that the card-reader is USB-based, search “USB Card Reader” on your favorite search engine. One additional problem that I forgot to mention in my reply above is that some users found themselves without access rights to their Documents folder after upgrading to Windows 10. For those users, the memory card (or camera’s content) is seen normally, but no image can be saved to the computer. This bug has been fixed, so people having upgraded recently (after November) should not have been hit. For the affected users the solution is to regain access of your Documents and Pictures folders. I’ve found a tutorial that describes the steps to regain access to Outlook data, but those same steps will work equally well for Documents and Pictures: http://www.msoutlook.info/question/pst-file-access-denied
On the bright side, one bug affecting SATA-based card readers has been fixed. This will resolve the issue where the Windows 10 Photos app (for example) does not recognizes a card reader that used to work just fine in Windows 7. Those card readers includes some built-in readers on slightly older computers and laptops, and many of the aftermarket “multi readers” that typically gets installed in a drive bay and have CF, SD xD and MemoryStick slot(s). If you have one of these, things will get much better when that particular fix eventually gets rolled out.
I’ve spent 2 days trying to download from my digital camera to windows 10. I’ve tried the cable connector and tried to download a drive without success. Followed umpteen instructions, but still end up looking at filed photos already there. I’ve downloaded different apps. Feel it is time Windows 10 gave us an easy upgrade to do this as it has just about put me in the looney bin and still no outcome. Certainly using Explorer has not helped at all – no camera icon to see anywhere. You would have thought this would have been all worked out before they sold this to anyone. Shame on you.
I use to download pictures from my camera on windows 7 and tag the pictures and put them into one folder. (Summer Vacation 2015.) I would have pictures taken over several days, weeks or even months I would download all at once.
I want them in one tagged folder and I cannot figure out how to do this on Windows 10. It puts the pictures in a screwy order I cant figure out and it dates them all wrong to boot.
How can I download my pictures exactly like I did on Windows 7. I have been downloading them on to a friends windows 7 computer, copying them to an external hard drive and then downloading it on to my windows 10 computer as a work around which is ridiculous.
I have old canon 4x . It has no wire to connect to computer ,I just put the chip into front of tower .
I know it has all my pics on it but windows 10 says no pics to import .?????.This windows 10 has many problems and just SUCKS!
Don’t put it out here if it is not ready for the public to use! Also had many problems with copy machine. It seems windows 10 is always the asshole on the play ground and does not play nice.
I also cannot save things and turn off computer > the next day all is gone ,and I mean ALL is gone! I want to switch back!!!
Nikon COOLPIX L310 camera doesn’t show up in Windows 10 Explorer
I tried to avoid the Windows 10 ‘free upgrade’ but somehow it slipped through. Now I can’t upload any photos, can’t begin to understand the ‘techy’ instructions. What was wrong with Windows 7? Can I restore Windows 7? I have zero use for all the new ‘gee whiz’ stuff that Microsoft eggheads create.
I have a Nikon D3100 camera and that does not show up in This PC.
Axel, you previously said, “first some Nikon cameras were affected by a bug, leaving most Nikon users in the cold. This was fixed in September” …… well it seems there are lots of Nikon users who still can’t import their pictures.
After downloading Windows 10, each time I connect my iPhone to download photos from it, a message says it has found over 2000 new photos and videos on my device. I have already downloaded all of them previously and DO NOT want to re-download them…I only want the most recent photos I have taken to download.
How can this be corrected so the next time I want to download only a few pictures, I don’t have to download all of them? I don’t want to delete all the photos off my phone, only a select few.
Win 10 doesn’t see my Olympus camera. Cannot put its memory card into the card slot as Olympus cards are wider. There seems to be no Win10 help on the Olympus web site & no driver downloads.
After 4 hours looking for a solution to downloading photos, I have decided to use my old laptop running WinXP and upload them to Dropbox. Having spent €1,000 on a new Windows 10 laptop, I wasn’t expecting this Gordian muddle. My views of Microsoft and Windows 10 are not suitable for a family web site.
I imported a bunch of videos from an older sony handycam. It looked like it was importing fine… took an appropriately long time and showed progress, but now I can’t find them ANYWHERE on the computer. Even worse, I was trying to get more space on the camera so I had checked “delete files from camera when copied” so they are gone from there. HELP!!!!!!!!!!!!!!!!!!!!!!!!!!!!!!!!!!!!!!!!!!!
Hi,
I just got windows 10 and I wanted to import some pics ad I followed your instructions but m camera won’t connect to my computer. HELP!!!
I could be here for hours, 1. there is no camera to click on 2. I can’t get back to you to tell you so you can advise me futher 3. stupid way to do things.I have already wasted 2 hours trying to get my pictures off my camera and onto my pc.
I’m having same problems, but the photos that do download are being attached with a video of the picture. strange! Does anyone have this problem?
I DID IT…I found a way to get photos off my camera, have them imported with dates, and in with my usual photos!
First, and most important, I have a desktop icon that says “This PC”…It is not the icon that you get by clicking File Explorer, which shows “Documents, this PC, Pictures, this PC etc” . Left double click that icon. I wish I could tell you how I got that icon on my desktop, but I really don’t know. If you can get it, the rest will work.
If your camera is connected to your PC, there should be a picture of the camera in the “Devices and Drives” section. RIGHT click the camera and see the import options. Then, it’s just like the good old days!
I have a problem that never happened to me before… I wanted to import videos from my camera, and it gives me an error saying that the file I wanted to copy is currently used. I was like WOT? How is that possible? I checked the memory card and it’s not even locked so PLEASE HALP ME!!!
This windows 10 is no fun,,,I cant see my camera photo,,,It just starts to show my 2000 photos,,,
Downloaded pics from camera to computer with Windows 10. Have never been able to find them. Want to do more but hesitate to. Where do I send them to, to find easily. My other pictures are still there. Why is this so hard now? Used to be a cinch. Want to get them to a photo shop online to order prints.
There is no camera to click when I go to File Explorer! Now what?
I have a canon IXUS 175 and am having problems all of a sudden downloading photos to my computer.When I’ve connected everything up correctly and switched on the camera the computer makes the usually pinging sound acknowledging the connection but no longer shows me on screen the options etc.
Sussed it out ,took a little while but got there in the end !!
1 Click on file icon.
2 Click on the this PC icon ,it should open up options showing camera icon ! Just right click camera icon and it opens up box showing “import pictures and videos”!1
Works for me anyway!
cant fine camera’
HELP Edward
cant download camera pictures
this needs fixing
I am having big problems with the downloading similar to many of the above.
WHY WHY WHY don’t Windows send out updates re the recognised problem that wasn’t there before giving guidance to the customers who have paid good money for Windows 10? I choose which charities I support and object to Bill Gates taking my money for his rubbish and giving it away to organisations of his choosing.
PLEASE sort this out and have the decency to inform all users of Windows 10 what you are doing to improve matters.
since about 2 weeks ago all photos are imported with “jpg” attached to the file name. I rename all of my photos, but why do I have to include the “jpg” as part of the file name?
That didn’t work at all.
My computer recognizes my camera as a usb device. I am finding it impossible to download photos. In Windows 7, once you plugged your camera in, a window would pop up asking if you would like to open, share import etc. When you selected import, you could then name the file (which would also name all of your photos. Now, you have to bugger around with file explorer, but as my computer doesn’t recognize my camera as a camera… I have to go through control panel to devices and muddle with it that way. I can open a new file, name/date it, then download pictures into this. Very cumbersome. And still all of my photos are still DSC0000 labelled. I want them labelled with location and dates dammit. Any non techno heavy advice would be most appreciated. I just want old import system back 🙁
My photos are all getting dumped into my general photo file! I no longer have my photos going into the my recently downloaded photos. It’s a total disaster! This just started on July 16, 2017. What is going on. I do all of my updates . . .
They need to fire the person responsible for creating windows 10. Just like everyone else on here I could do everything I needed to do with windows 8 or whatever it was. Now I have to wait till my young son-in-law stops by to get things done. I am 77 and all these so called improvements are driving me from the computer. Gates is more interested in making money than putting out a user friendly computer, and that’s the truth of the matter.
If I could get my money back for this computer I would. I spent yesterday evening and all morning trying to import a few pictures so to put them on Craig’s list. While I have had trouble in the past I could usually fight my way through it, not this time. I hope Bill Gates is watching/listening.
the window won’t show up on my computer, is my problem… :'(
You’re assuming that a person already knows how to use Windows 10. Your photos are blurred so you can’t see what you should be looking for. Some people don’t know Windows 10. This was a total waste of time for me. Absolutely no help at all. Next time you do a tutorial type article warn people that it’s not for beginners. Thanks for nothing